How To Paint Glass Bottle Art In Acrylic
LESSON ONE: Collect a bunch of bottles in all shapes and sizes. You can make glass art works for any occasion, holiday, or any theme for creative designed art. The bottle becomes your canvas.
LESSON TWO: Remove labels from the bottles. Any adhesive residue can be easily removed with "GOO GONE" spray gel available at any household store.
LESSON THREE: Thoroughly wash the bottles inside & out with dish detergent. Then you should rinse carefully to remove any soap residue. Dry bottles completely (on the outside) with a soft terry towel. You will need to turn bottles upside down and allow inside drying for a few hours.
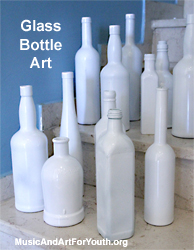
LESSON FOUR: Spray all the bottles with a primer (allow to dry for 24 hours), as a first step. The coat of primer, your first coat, ensures that the paint will stick to the glass. You won't want to skip that step to avoid the paint chipping off the glass surface. After the primer coat, repeat the process with the main paint coat.
Spray many thin layers of paint to achieve good results. If you spray too close to the bottles, or too much paint at one time, the paint will run leaving a surface with drips, which isn't the end of the world, but certainly not desirable.
Take our advice and be patient with this step. Spray from far distance, and a little spraying at a time. It must be outdoors, and on a surface like a large cardboard box. You possibly may need a drop cloth to cover nearby walls, etc. There should be no wind. You need stillness to spray paint.
You will need lots of spray paint to do lots of bottles! You may use gloss and matte (flat paint), but you may prefer the gloss. It's experimental to try both for effect. Now when you have all the plain white base coat bottles, it's time to paint art and have lots of fun!
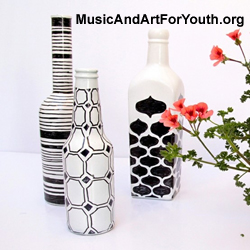
LESSON FIVE: Make bold and decorative art. This is a super simple way to turn painted bottles into cool art works. You can accomplish this with just a simple permanent black marker, or have lots of fun applying painted designs and illustrations on the bottle. The results are so much fun, and perfect for catching the eye of art buyers. You can even paint something more sophisticated if you spend the time to draw with precision.
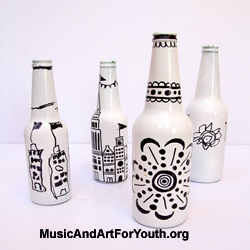
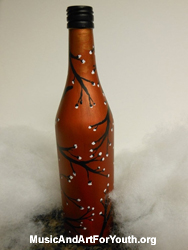
LESSON SIX: Come up with favorite geometric patterns that you'd like to see in your art. Apply it to a bottle and enjoy! It's always a great creative exercise to get our kids to draw on something three-dimensional! So paint some bottles white, or any light color, and enjoy using them as canvases for some original art! The dark colored sample above was designed with finger nail polish.
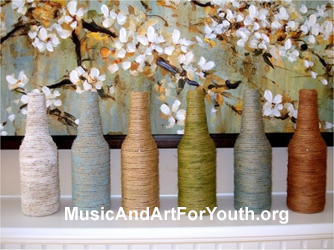
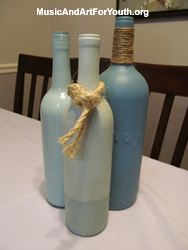
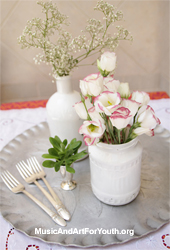
LESSON SEVEN: Photograph your art bottle upon completion in order to save the ideas for future. You can even capture the loveliness of creative ideas and use groups of three matching pieces in your bottle art. As far as groupings, we might suggest one jar to hold a plant, (maybe a succulent plant), and pair it with two other bottles of different sizes and heights. You may install the bottle pairing together with a hot glue gun, or other effective adhesives.
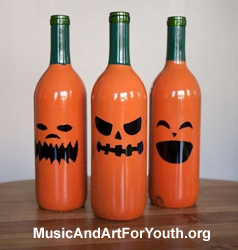
LESSON EIGHT: You may experiment with colored twine wrapping, and even ornaments which will be attached with adhesives.
Concert Art Shows
a Saint Pierre Production
In The Cultural Arts
A Big "Help The KIds" Opportunity
The Concert Art Shows are produced by Saint Pierre with the cultural arts in Ventura. Established in 2009, our mission is the convergence of the visual arts & the performing arts together. Our efforts benefit the artists and our fund raising cause: Music And Art For Youth" by helping the needy kids 9- 19 years old .

